In the following use case an user (user1) wants to load a machine where he could install a web service, a wiki system in this case. We will find out what steps we should follow in order to complete these actions.
OpenStack is a web portal where we can access to the cloud through. To get access to this platform you should obtain an username and password. To do so, please, create a new ticket to Cloud queue in our support system (http://support.ifca.es) applying for a new Cloud account. You need an IFCA account before.
Once you get this, you'll be allowed to access to OpenStack: https://portal.cloud.ifca.es/. This portal has a menu with 4 options: Overview, Instances & Volumes, Images & Snapshots and Access & Security.
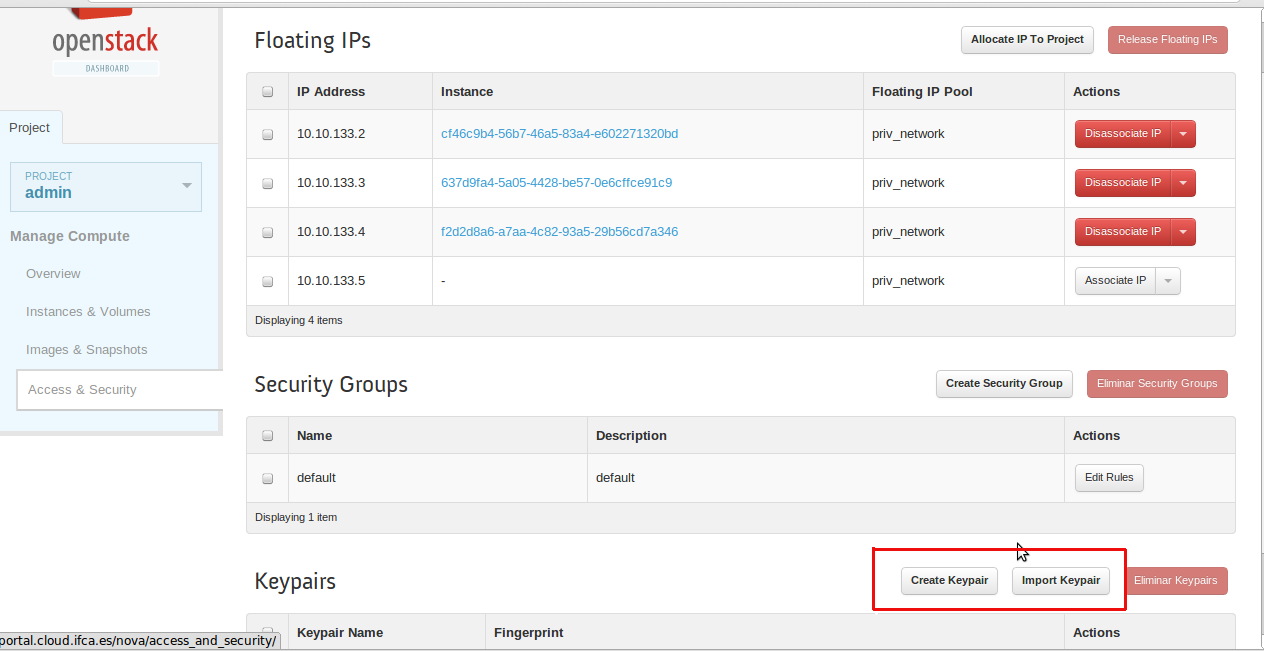
If you don't have created a keypair (this is a file that you have to use to connect to the image that you are going to create), you should get one. Go to Access & Security and click on “Create Keypair” at the bottom of the page. This will load a file that you have to save in your computer. This file will let you to access to the image through ssh. If you already have a keypair you can import it as well.

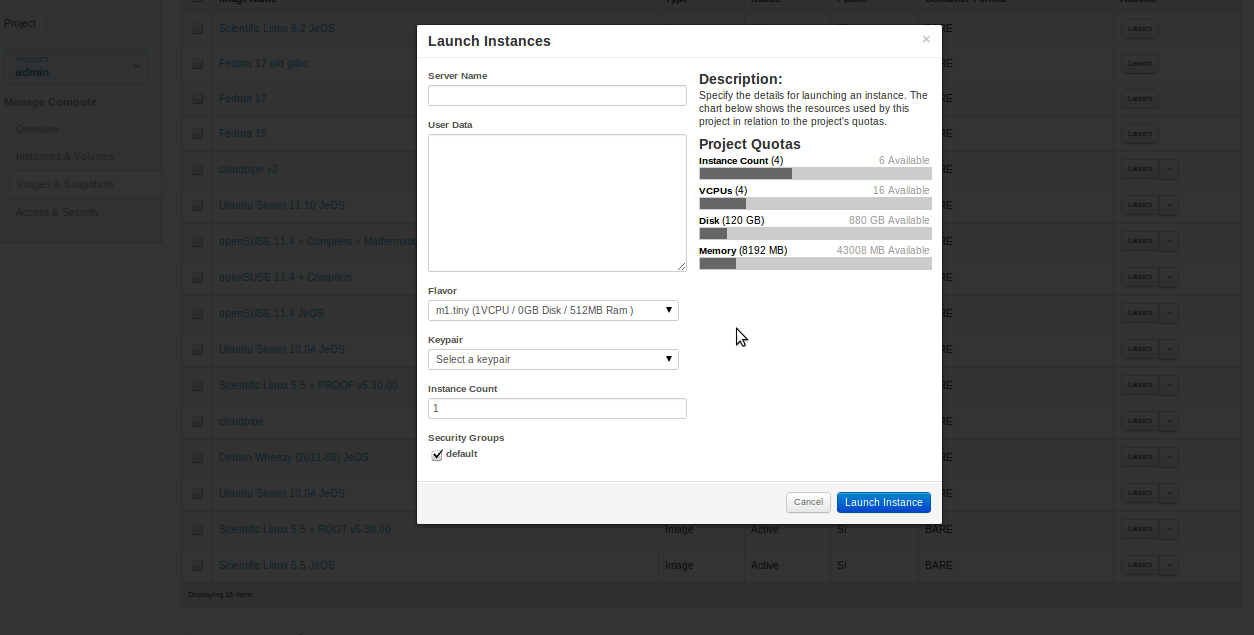
First of all, you should launch the image that you want to use (within a list of OS) and click “Launch”. A new popup window will be shown and you have to choose the configuration of the system (requirements, name of the server...). In this case, we will use an image called IFCA Debian Wheezy (2011-08) JeOS. We can choose the image requirements in “Flavor” and we should choose our keypair in the option below.

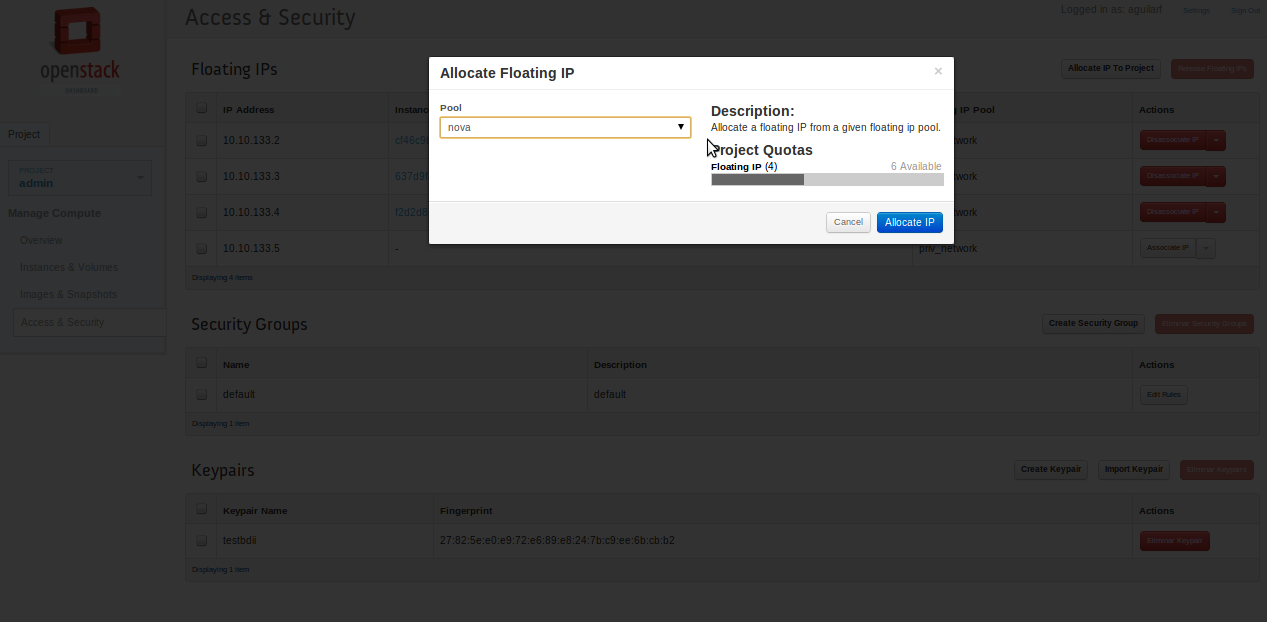
In order to access throw ssh to the image, you must asign an IP to the instance. Click on “Access & Security” again (in the left menu) and select “Allocate IP to project”. Choose the type of IP that you want to use and click “Allocate IP”. After that, you need to link that IP with your new image. Click on the button “Associate IP” of your new IP and select the instance that you have just created. If there is no IP available you can “Allocate IP to project” to create one. For installing a wiki, we need a public IP, so we will choose a nova IP like 193.*...

Last step is to download the keypair (if you haven't already done) that you have created or imported and move it to the machine that you will use to conect to the instance. Change permission to 600 and use the following command in your terminal to connect:
$ ssh -i clave.pem root@cloud.image.IP
Where cloud.image.IP is the IP that of your image, like 172.*.*.*... You can access this IP from IFCA gridui (gridui.ifca.es).
Now, you have complete access to a virtual machine, so you are able to use it like your own computer. To install the moinmoin wiki system, please follow the following instructions: