|
Size: 1335
Comment:
|
Size: 1344
Comment:
|
| Deletions are marked like this. | Additions are marked like this. |
| Line 17: | Line 17: |
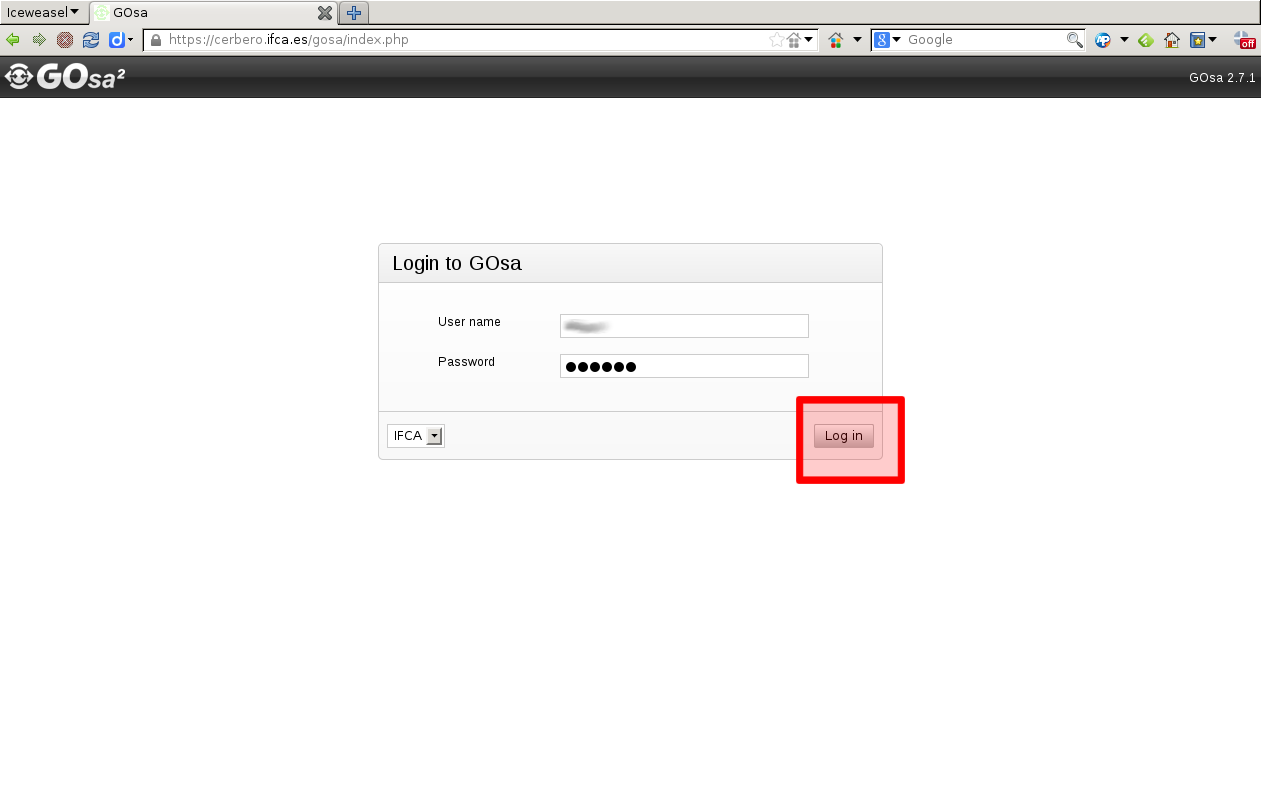
| 1. Login to https://cerbero.ifca.es | 1. Login to https://cerbero.ifca.es |
| Line 20: | Line 20: |
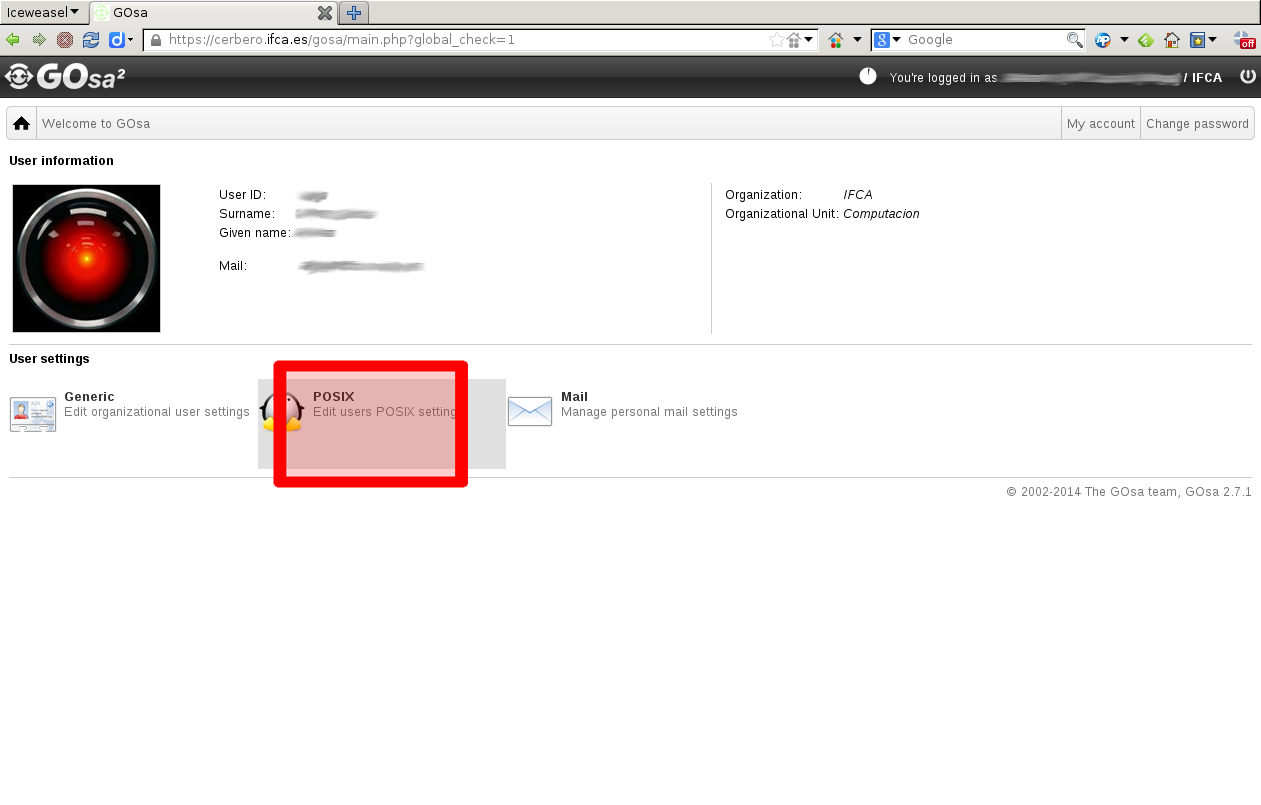
| 2. Click "POSIX" in order to edit your POSIX settings. | 2. Click "POSIX" in order to edit your POSIX settings. |
| Line 23: | Line 23: |
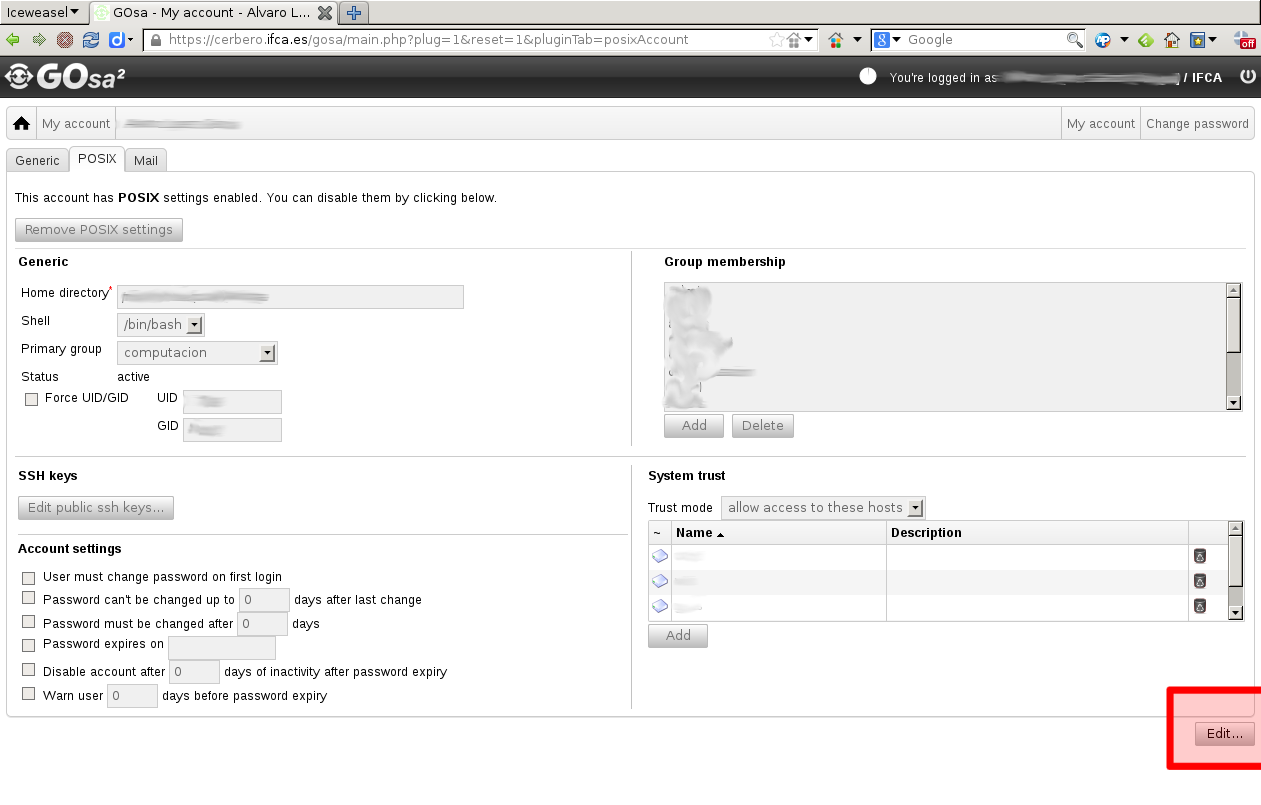
| 3. Click "Edit" button. | 3. Click "Edit" button. |
| Line 26: | Line 26: |
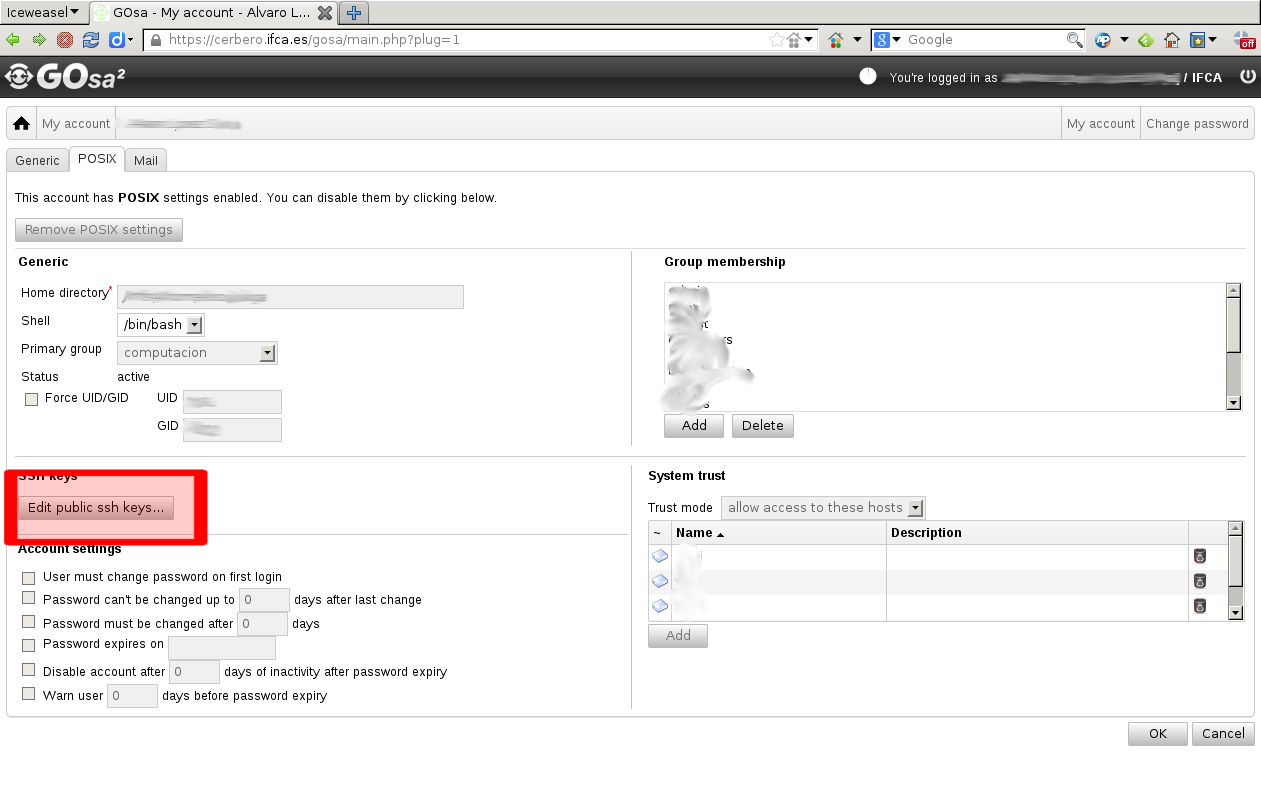
| 4. Click "Edit public ssh keys..." button. | 4. Click "Edit public ssh keys..." button. |
| Line 29: | Line 29: |
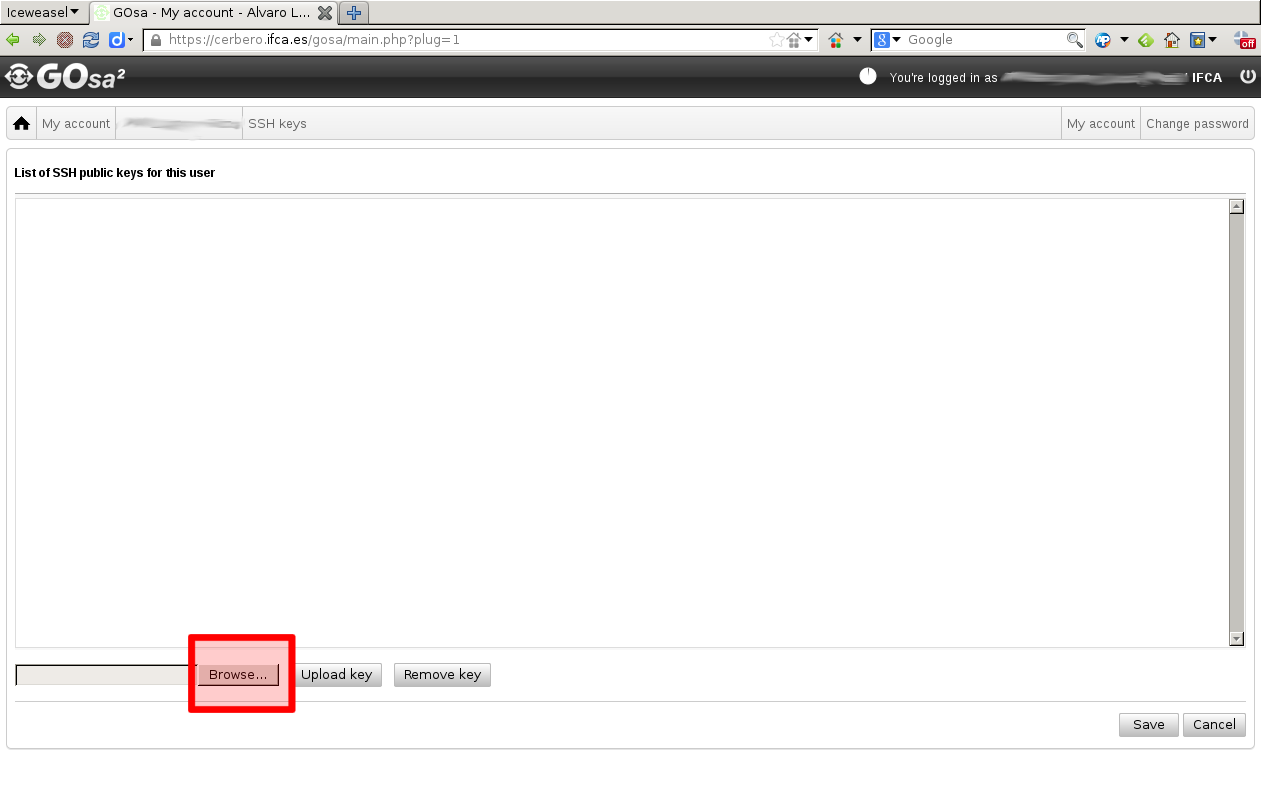
| 5. From this screen you can manage the the public SSH keys that you have added to your account. You can have several keys (for example, one for the office PC, another, for your laptop, etc.). Click "Browse" to select the file of your public key and upload it to the server. | 5. From this screen you can manage the the public SSH keys that you have added to your account. You can have several keys (for example, one for the office PC, another, for your laptop, etc.). Click "Browse" to select the file of your public key and upload it to the server. |
| Line 32: | Line 32: |
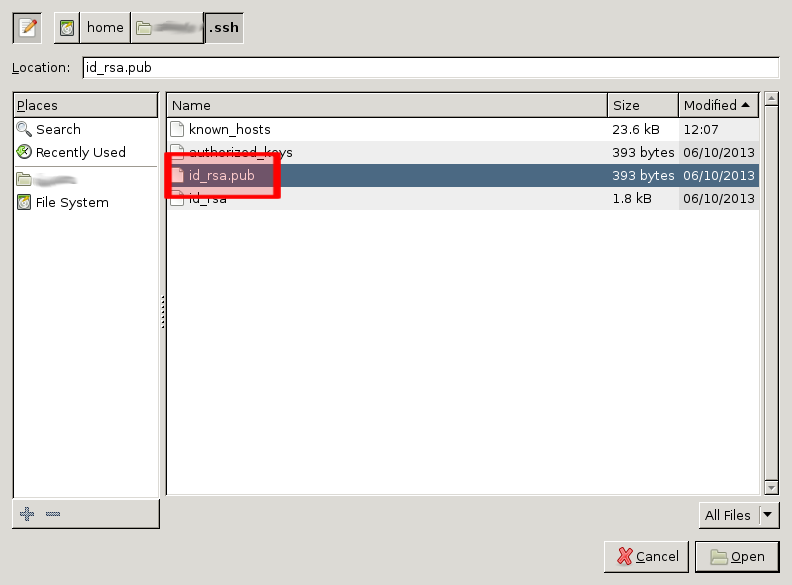
| 6. Search the file containing your public key and upload it. | 6. Search the file containing your public key and upload it. |
| Line 35: | Line 35: |
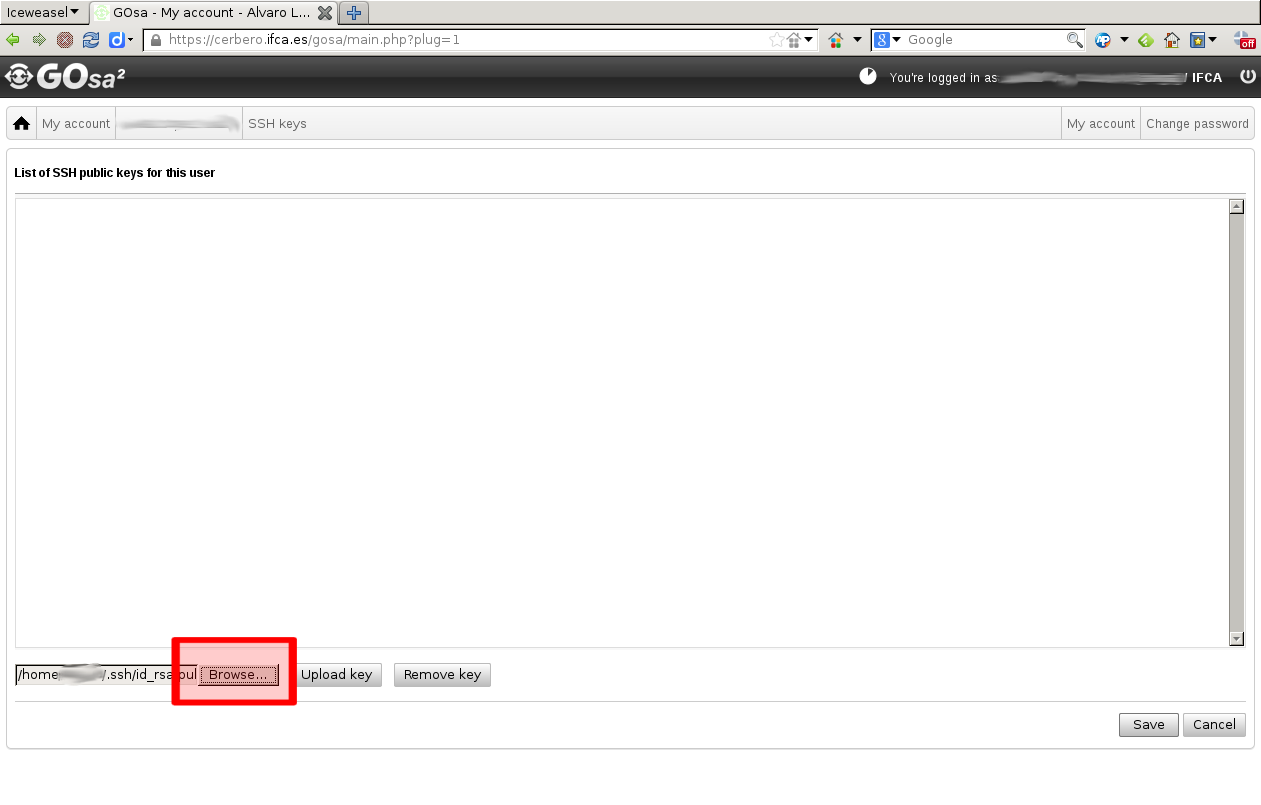
| 7. Click "Upload" and your public key will be added. | 7. Click "Upload" and your public key will be added. |
| Line 38: | Line 38: |
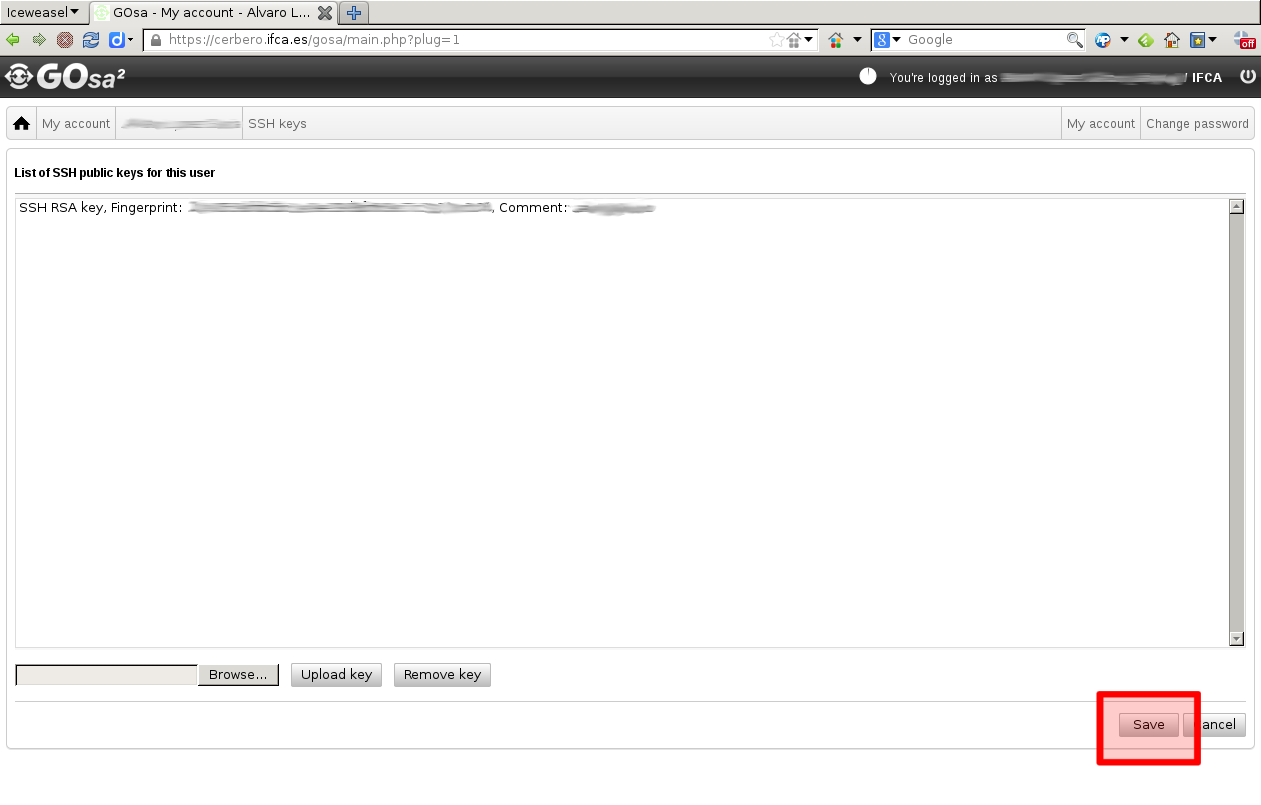
| 8. You're almost done, your key has been added. Click save to accept the changes. | 8. You're almost done, your key has been added. Click save to accept the changes. |
| Line 41: | Line 41: |
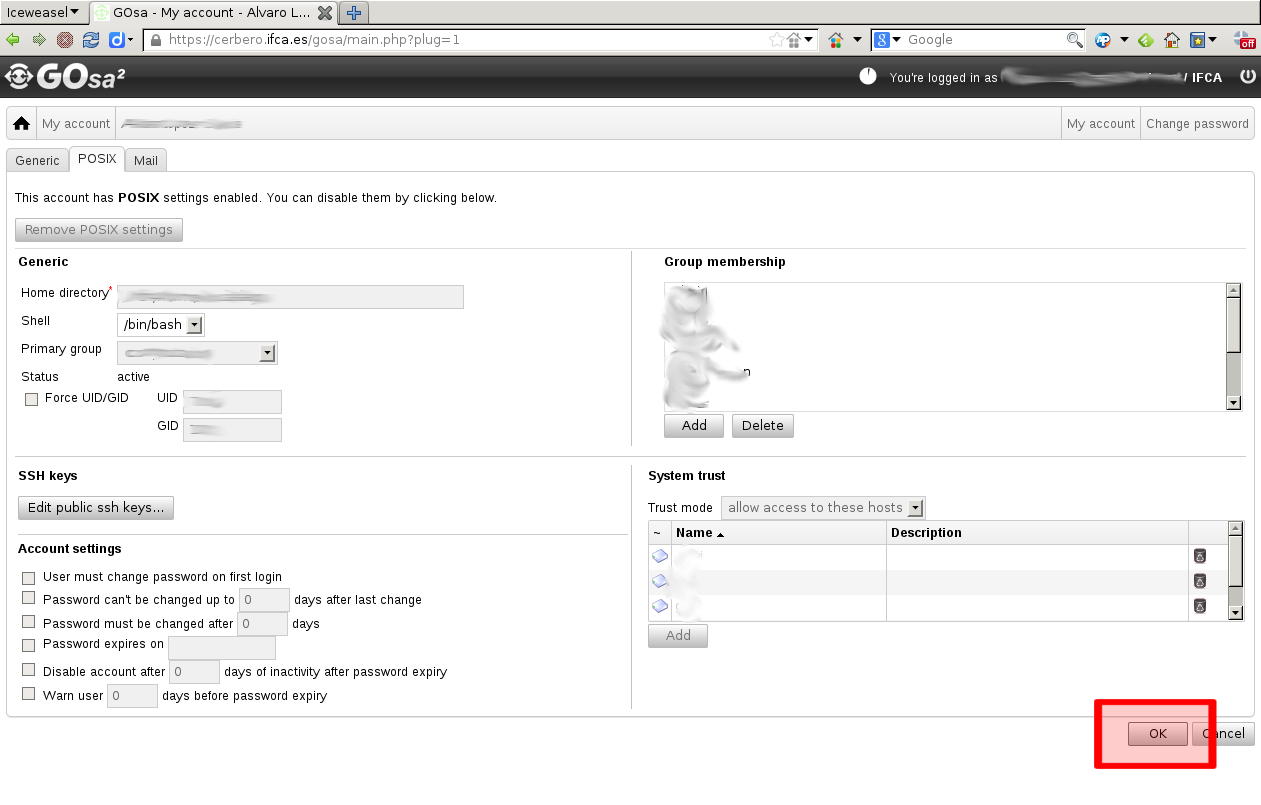
| 9. Click "OK" and now you will be able to login using your SSH key. | 9. Click "OK" and now you will be able to login using your SSH key. |
SSH key Management
SSH Key creation
Windows (PuTTY)
Check this page for more information.
Linux
Check this page for more information.
Upload key
Using cerbero
Login to https://cerbero.ifca.es
- Click "POSIX" in order to edit your POSIX settings.
- Click "Edit" button.
- Click "Edit public ssh keys..." button.
- From this screen you can manage the the public SSH keys that you have added to your account. You can have several keys (for example, one for the office PC, another, for your laptop, etc.). Click "Browse" to select the file of your public key and upload it to the server.
- Search the file containing your public key and upload it.
- Click "Upload" and your public key will be added.
- You're almost done, your key has been added. Click save to accept the changes.
- Click "OK" and now you will be able to login using your SSH key.

