|
Size: 1344
Comment:
|
Size: 2526
Comment:
|
| Deletions are marked like this. | Additions are marked like this. |
| Line 1: | Line 1: |
| = SSH key Management = | = SSH Key Management = SSH Keys is a way of identifying yourself to an SSH server using cryptography instead of the traditional username and password combination. This method has several advantages over the password based authentication: the passwords are not sent to trough the network, there is no risk for brute force attacks and when using together with the SSH agent it is possible to login to multiple servers without entering your credentials again and again. At IFCA it is highly reccomended to use SSH Key authentication for accessing the [[Cluster]]. We reccomend the reading of the fantastic [[https://wiki.archlinux.org/index.php/SSH_Keys|Arch Linux SSH Keys guide]] for more details. Some instructions are provided below though. |
| Line 17: | Line 29: |
| {{{#!wiki caution Note that this method will only work for Scientific Linux 6 machines. However, it is reccomended to use it, since it may become the default in the future. }}} |
|
| Line 20: | Line 37: |
| 2. Click "POSIX" in order to edit your POSIX settings. | 2. Click `POSIX` in order to edit your POSIX settings. |
| Line 23: | Line 40: |
| 3. Click "Edit" button. | 3. Click `Edit` button. |
| Line 26: | Line 43: |
| 4. Click "Edit public ssh keys..." button. | 4. Click `Edit public ssh keys...` button. |
| Line 29: | Line 46: |
| 5. From this screen you can manage the the public SSH keys that you have added to your account. You can have several keys (for example, one for the office PC, another, for your laptop, etc.). Click "Browse" to select the file of your public key and upload it to the server. | 5. From this screen you can manage the the public SSH keys that you have added to your account. You can have several keys (for example, one for the office PC, another, for your laptop, etc.). Click `Browse` to select the file of your public key and upload it to the server. |
| Line 35: | Line 52: |
| 7. Click "Upload" and your public key will be added. | 7. Click `Upload` and your public key will be added. |
| Line 38: | Line 55: |
| 8. You're almost done, your key has been added. Click save to accept the changes. | 8. You're almost done, your key has been added. Click `Save` to accept the changes. |
| Line 41: | Line 58: |
| 9. Click "OK" and now you will be able to login using your SSH key. | 9. Click `OK` and now you will be able to login using your SSH key. |
| Line 46: | Line 63: |
Another alternative is to SSH to the machine where you want to use your public key and add the contents of your public key file to the `.ssh/authorized_keys` file. You can add it with the following command: {{{ $ ssh-copy-id username@gridui.ifca.es }}} |
SSH Key Management
SSH Keys is a way of identifying yourself to an SSH server using cryptography instead of the traditional username and password combination. This method has several advantages over the password based authentication: the passwords are not sent to trough the network, there is no risk for brute force attacks and when using together with the SSH agent it is possible to login to multiple servers without entering your credentials again and again.
At IFCA it is highly reccomended to use SSH Key authentication for accessing the Cluster.
We reccomend the reading of the fantastic Arch Linux SSH Keys guide for more details. Some instructions are provided below though.
1. SSH Key creation
1.1. Windows (PuTTY)
Check this page for more information.
1.2. Linux
Check this page for more information.
2. Upload key
2.1. Using cerbero
Note that this method will only work for Scientific Linux 6 machines. However, it is reccomended to use it, since it may become the default in the future.
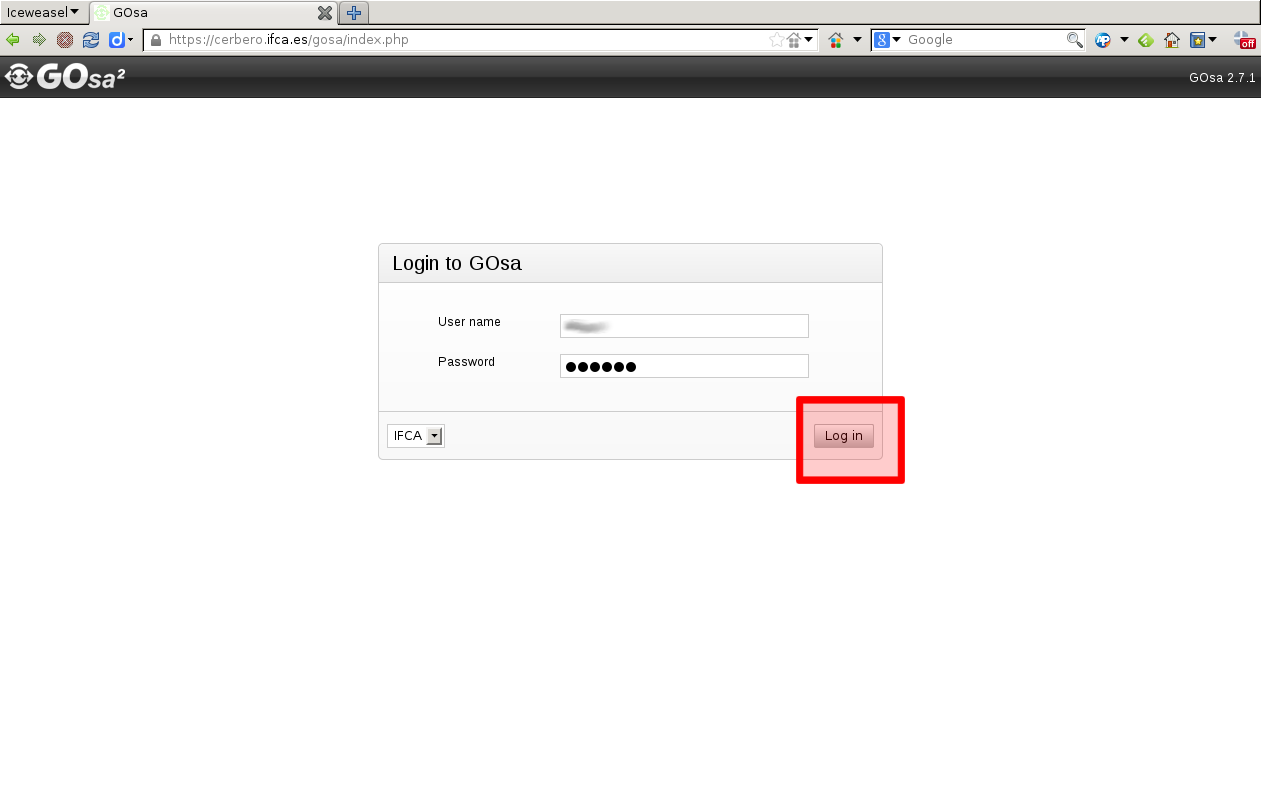
Login to https://cerbero.ifca.es
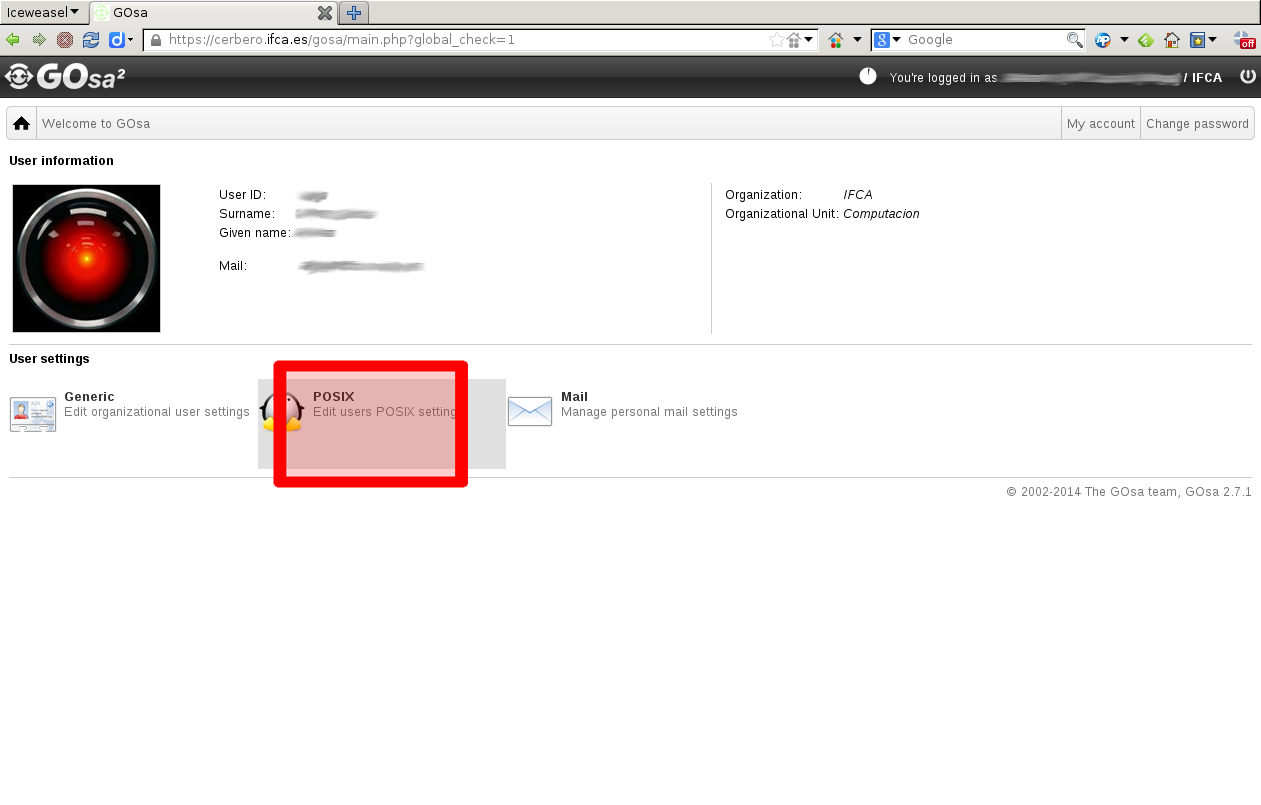
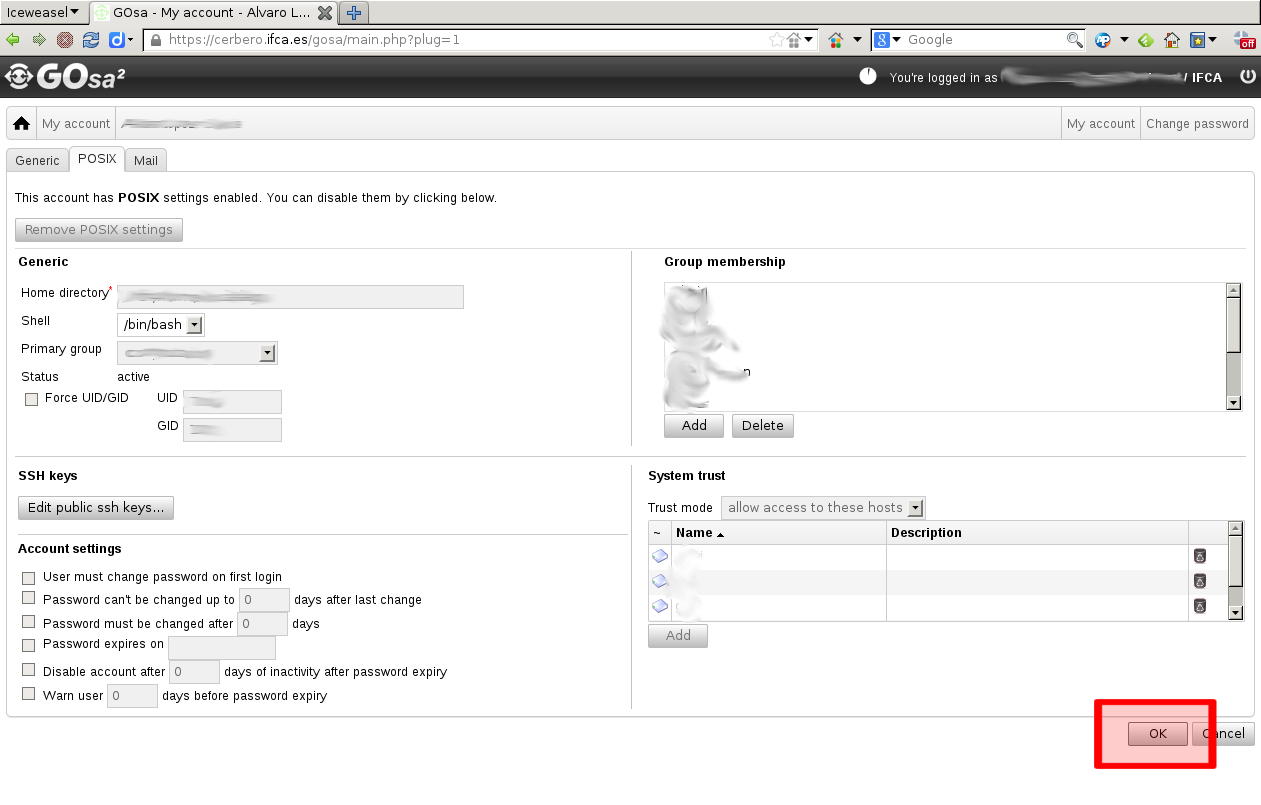
Click POSIX in order to edit your POSIX settings.
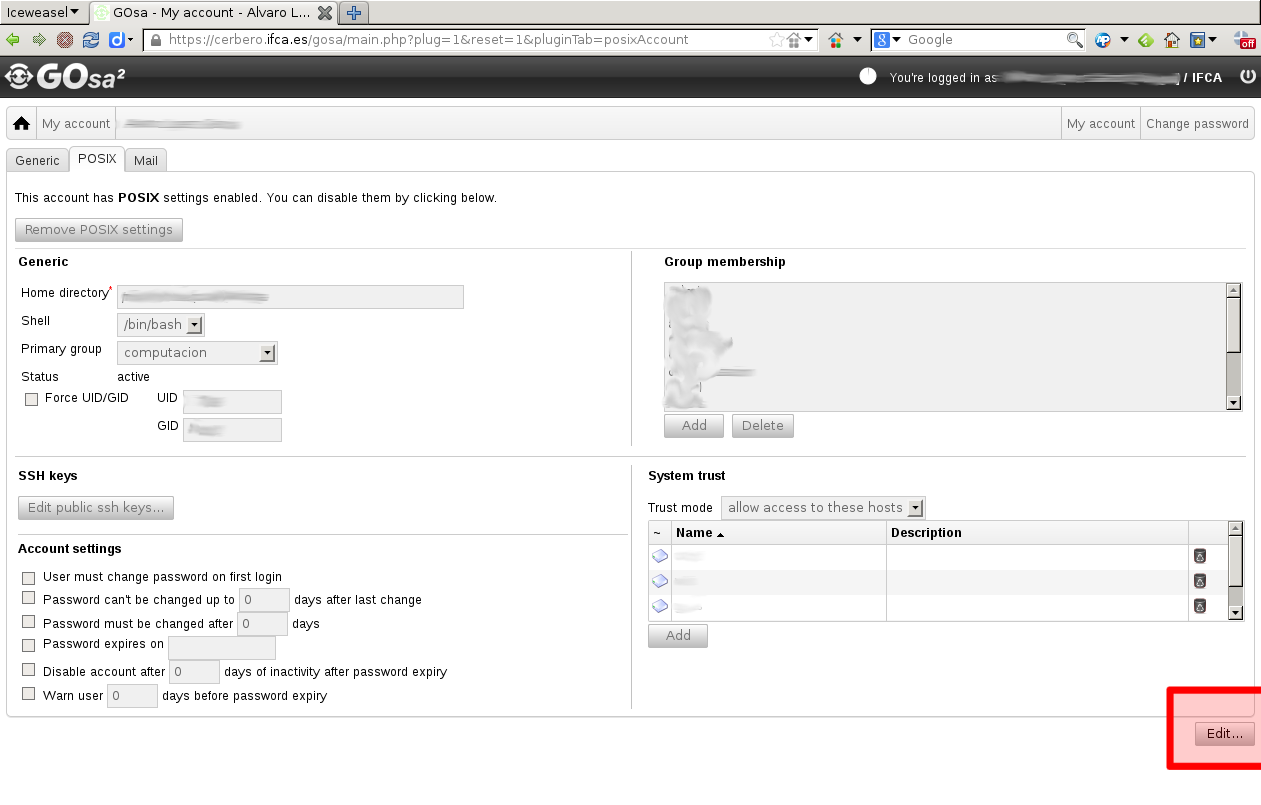
Click Edit button.
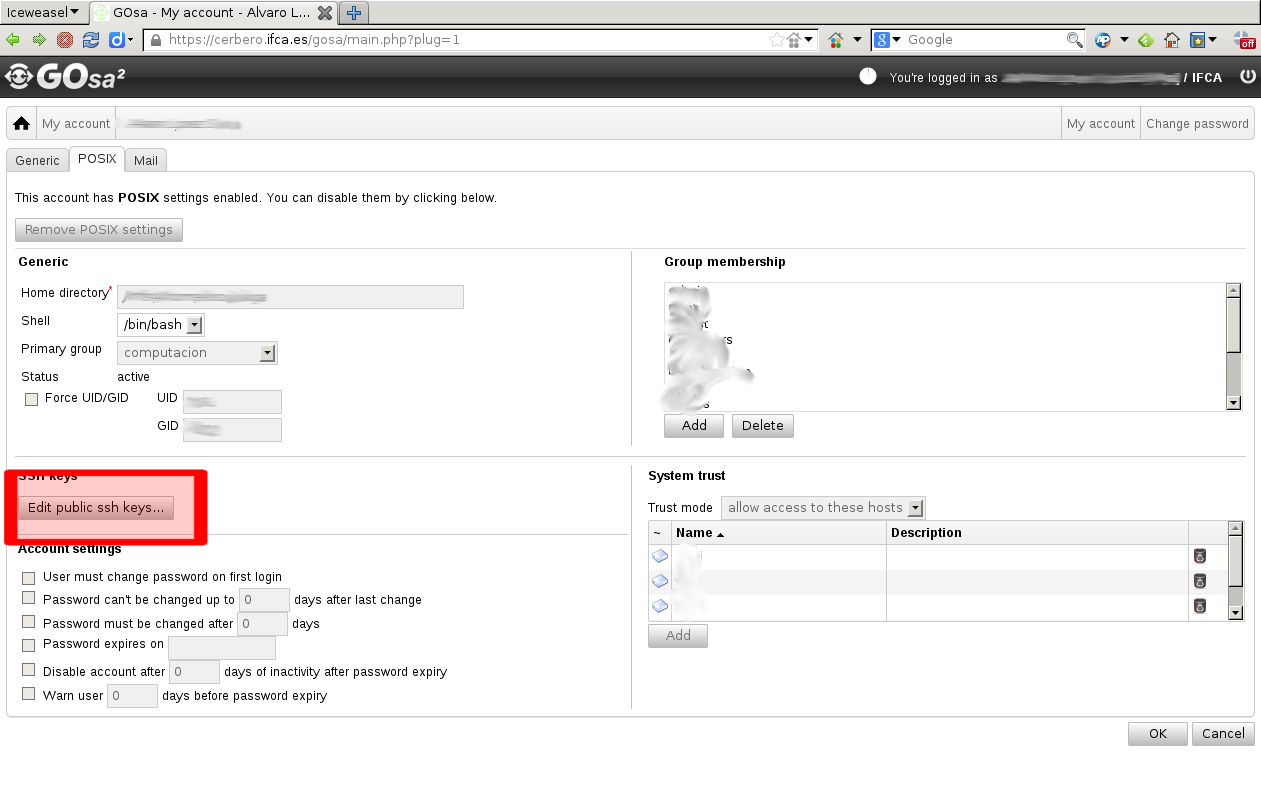
Click Edit public ssh keys... button.
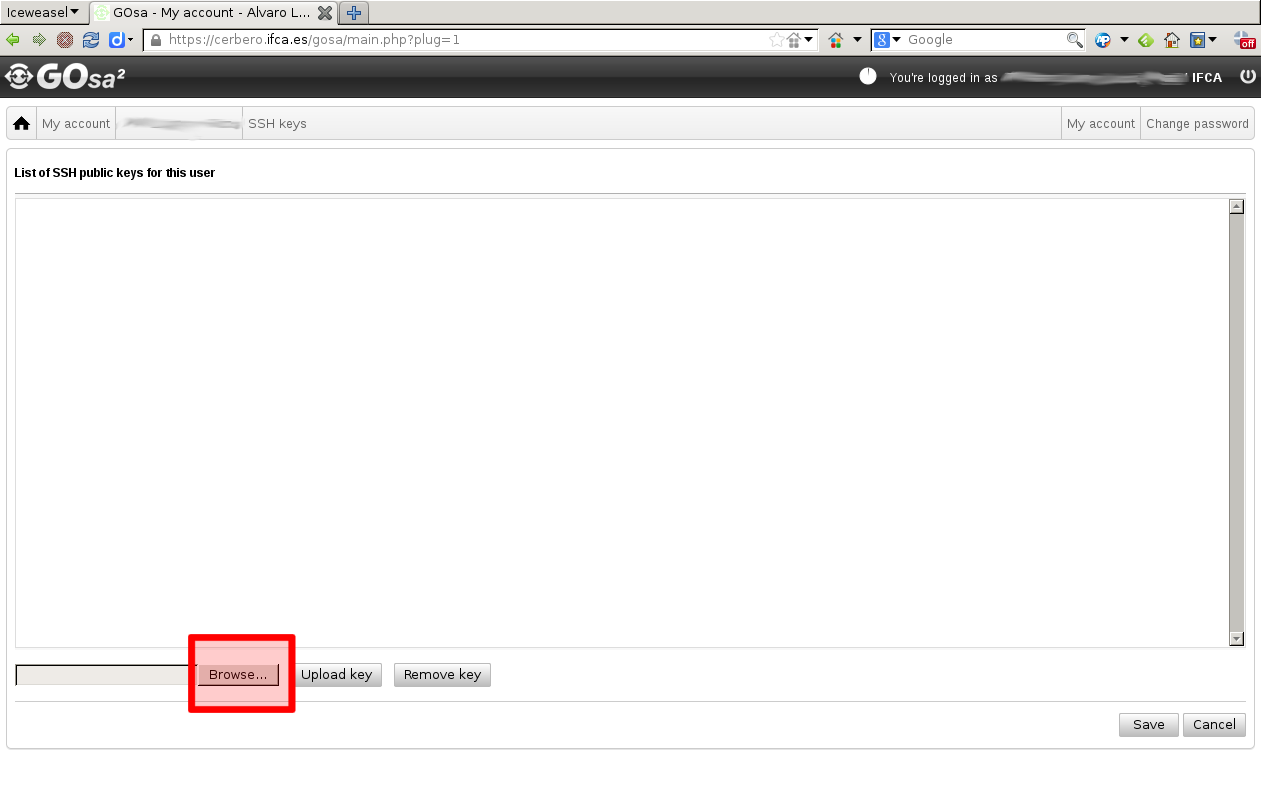
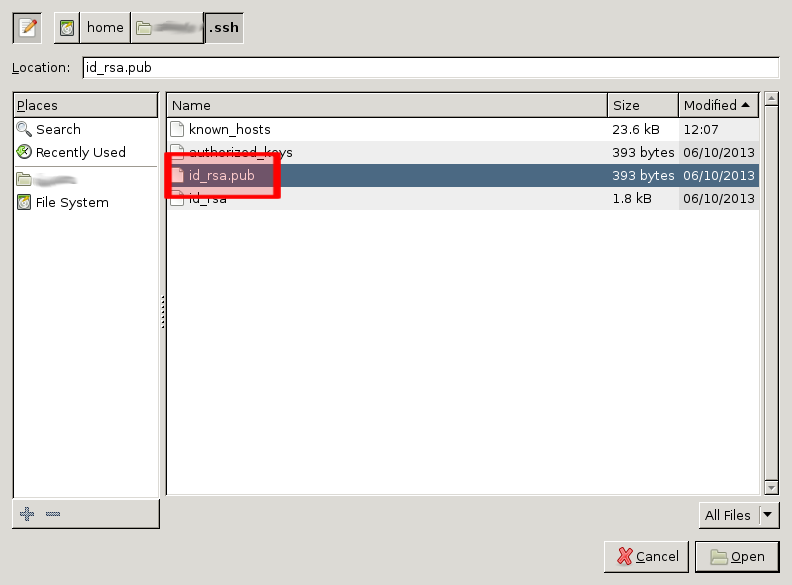
From this screen you can manage the the public SSH keys that you have added to your account. You can have several keys (for example, one for the office PC, another, for your laptop, etc.). Click Browse to select the file of your public key and upload it to the server.
- Search the file containing your public key and upload it.
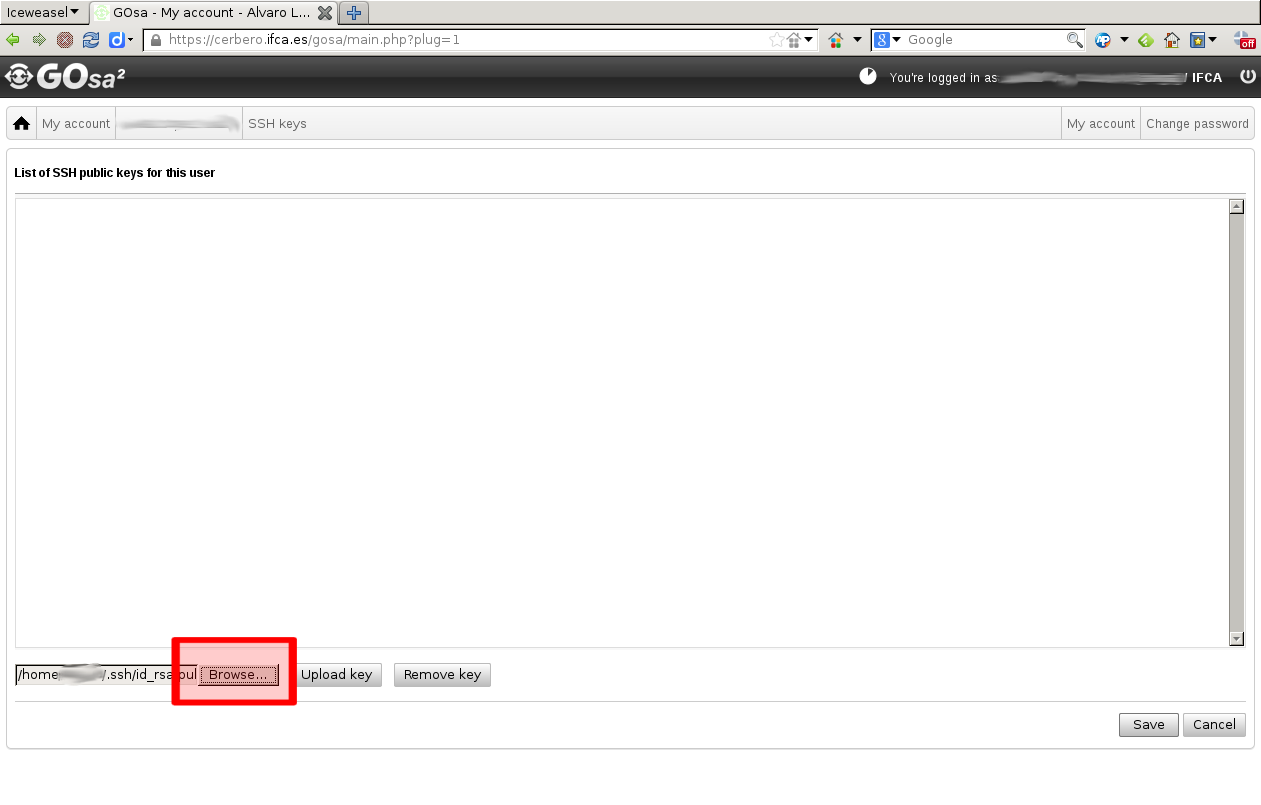
Click Upload and your public key will be added.
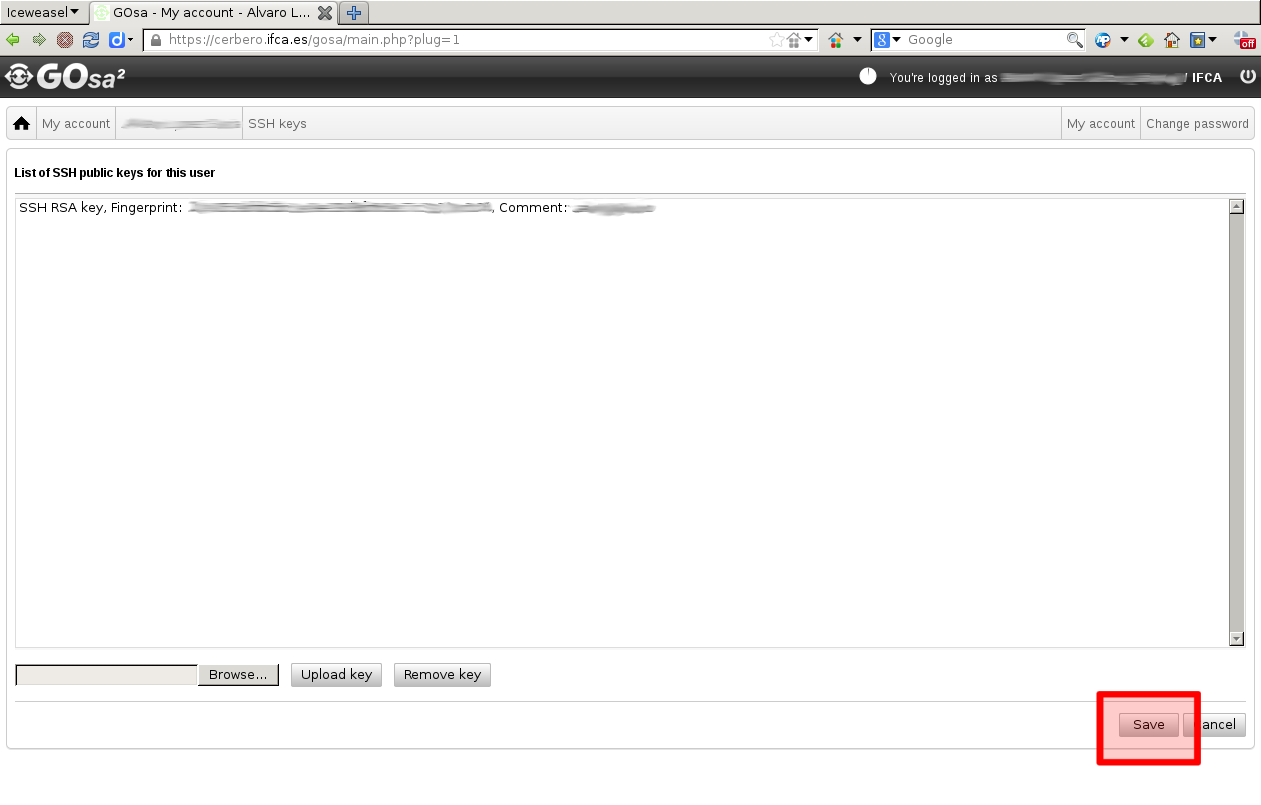
You're almost done, your key has been added. Click Save to accept the changes.
Click OK and now you will be able to login using your SSH key.
2.2. Using the authorized_keys file
Another alternative is to SSH to the machine where you want to use your public key and add the contents of your public key file to the .ssh/authorized_keys file. You can add it with the following command:
$ ssh-copy-id username@gridui.ifca.es

