|
Size: 2092
Comment:
|
Size: 2467
Comment:
|
| Deletions are marked like this. | Additions are marked like this. |
| Line 50: | Line 50: |
| 1. Create the mount directory {{{ sudo mkdir /mnt/WebDav }}} 1. Mount the file system * Volatil {{{ sudo mount.davfs 'http://domain.tld/davpath' /path/to/webdav }}} * Permanet (edit /etc/fstab anf add the following line) {{{ https://pool01.ifca.es/username /mnt/WedDav davfs user,rw,noauto 0 0 }}} |
The WebDav Service
- Web Distributed Authoring and Versioning (WebDAV) is an extension of the Hypertext Transfer Protocol (HTTP) that facilitates collaboration between users in editing and managing documents and files stored on World Wide Web servers.
- The WebDAV protocol makes the Web a readable and writable medium. It provides a framework for users to create, change and move documents on a server; typically a web server or web share.
HOWTO use WebDav
WebDav can be used under windows, linux or MAC. We always can access in read mode to our file repository using a web browser, and seting in the address: https://pool01.ifca.es/username, (remember tha IFCA only supports https).
Windows
- To enable the read/write mode, we need to mount the network device under Windows.
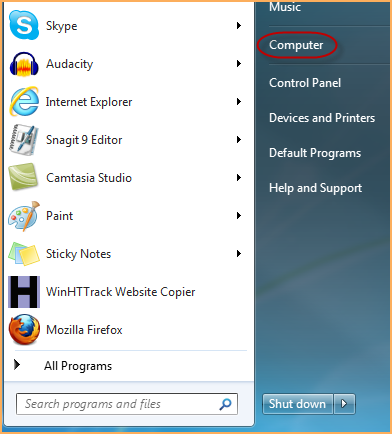
- Select Computer
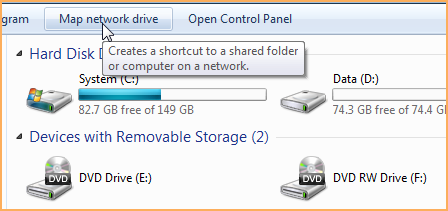
- Map Network Drive
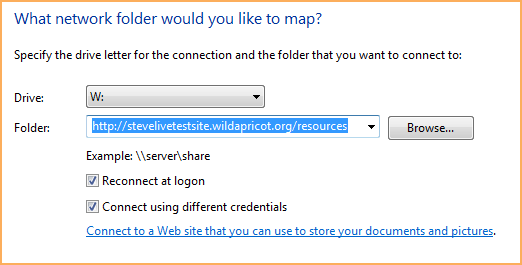
Within the Map Network Drive dialog, enter your WebDAV address: http://your_site_url/resources (where your_site_url is pool01.ifca.es).
- Click the two check boxes at the bottom.
- Click Finish
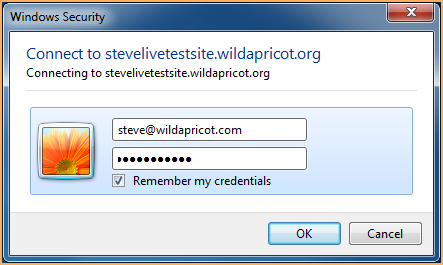
- Enter yourA Ldap user name and password.
- Select Computer
Linux
- Under linux we can access in read/write mode using to different access
The Cadaver client
- Cadaver is a command-line WebDAV client for Unix. It supports file upload, download, on-screen display, namespace operations (move/copy), collection creation and deletion, and locking operations.
cadaver https://pool01.ifca.es:username/
- Cadaver is a command-line WebDAV client for Unix. It supports file upload, download, on-screen display, namespace operations (move/copy), collection creation and deletion, and locking operations.
- Under Debian or Ubuntu
sudo apt-get install davfs2
Under RedHat
yum install davfs2
- Add your user to davfs2 group
sudo usermod -a -G davfs2 username
- Create the mount directory
sudo mkdir /mnt/WebDav
- Mount the file system
- Volatil
sudo mount.davfs 'http://domain.tld/davpath' /path/to/webdav
- Permanet (edit /etc/fstab anf add the following line)
https://pool01.ifca.es/username /mnt/WedDav davfs user,rw,noauto 0 0
- Volatil


